Stories from the chuck wagon trail, recipes, and some good ole tips from a chuck wagon cook.
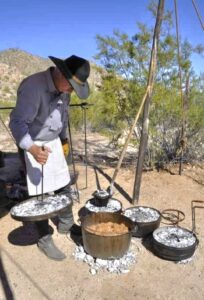
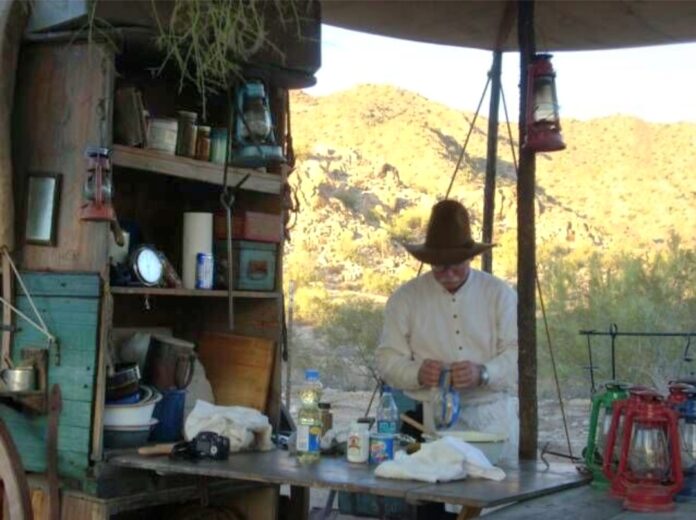
I’d like to say “Howdy” from the flatlands of Arizona. As an admitted “flat lander,” I would like to regain some credibility by saying that, as a kid growing up in the 50s and 60s, cowboys and TV westerns were King. I was fortunate to have been able to visit the rim country almost every summer and the Halter Cross Ranch in particular. To my mind, that beat going to Disneyland, hands down! To this day, I have an undying interest and love of all things cowboy, western and rim country. So much so that I have owned and run an actual old chuck wagon for many years now. I try to keep it as real and true to the old ways as possible. The main thrust of this article is about the dutch oven, which would have been found on any cattle trail drive and later in the roundup camps after the railroads made trail drives obsolete.
First of all, what is a dutch oven? These days, a variety of cooking pots are called dutch ovens. The type I am talking about has been used since Lewis and Clark went on their Corp of Discovery Expedition in 1804. They were initially brought over to America by the British. The name is derived from the fact that the sand-casting process used to make the cast iron pots was gleaned by an Englishman named Darby, who was watching dutch craftsmen in the Netherlands and saw it was a more cost-effective method. For centuries, the dutch ovens used by Lewis and Clark, chuckwagon cooks, Mormon pioneers, and Scouts all have some common traits. A “camp” dutch oven is made of cast iron, has three stubby feet on the bottom side, and the lid has a raised lip around the edge. Usually, they will have a wire bail handle for the pot, and the lid will have a loop on the top to accept a lid lifter. In contrast, a “kitchen” dutch oven for home use doesn’t have the feet underneath nor the lip around the lid.
The legs underneath and the lip around the lid make this one of the most useful, versatile cooking utensils around. The legs underneath allow you enough room to put hot coals beneath, while the lip on the lid allows you to put hot coals on top. You can cook, fry, boil, bake, steam, simmer, broil, braze just about any food you can imagine. The principle is the same if you think about how your oven/stove range works at home. If you want to cook something, you put coals underneath and on top of the oven. You would only put the coals underneath to fry or brown food. The same would go if you wanted to bring liquid to a boil. Baking usually calls for a few coals underneath and more coals on the top. To brown or broil the top of a casserole at the end, you would heap coals on the lid to accomplish that. I have made stews, beef, pork, chicken, and game soups. I can’t even count the number of biscuits, breads, and cobblers I have made over the years in dutch ovens. I do beans in the dutch oven if they’re pre-cooked or out of a can. Dry beans tend to turn dark and take on an iron taste at times. In that case, I use a huge enamel pot. But I digress. I want to leave you with a few dutch oven recipes that are old standards but are updated to please the modern-day palate. As Cookie would say, “Grab a plate and growl.”

EZ AZ Biscuits: Green chili, cream corn and cheese for a 10-inch dutch oven.
- 1 ½ cups of Bisquick mix
- 1 can cream corn
- 1 can condensed milk
- 1 can green chilies chopped
- ¾ cup of grated cheddar cheese
Use Kingsford charcoal! Very important. In a starter chimney, add about 30 briquettes of Kingsford charcoal and light. Position your oven near the chimney so it can start to pre-heat. In a medium bowl, mix all ingredients together, except milk. Mix all ingredients well. Once mixed, add in about half a cup of condensed milk and mix well. Add more if needed. You want the mix to be somewhat stiff but able to be pushed off a spoon into the oven. When the charcoal is fairly well lit, (charcoal will have white tips on it) put about 9 coals on the ground in an even circular pattern. Put the oven over the coals and wipe the insides with a thin coat of shortening or spray oil. Using a large tablespoon, spoon a heaping spoonful of the batter into the dutch oven. Make space for about 10 biscuits. Put the lid on the oven and cover it evenly with about 18 charcoal briquettes. Bake for about 12 to 15 minutes. Until the biscuits start to brown. Great with beef dishes, chili, beans or with a cold beer.
AZ Cowboy Beans for a 10-inch dutch oven.
- 2- 29 oz. cans of Pinto beans (Goya)
- 1 ½ cups of chicken stock
- 1 bottle dark Mexican beer
- 1 can chipotle chilies in adobo sauce
- 5-6 slices of bacon
- Homemade or deli Pico de Gallo
- ½ cup of Cotija cheese or Mexican cheese
In the charcoal starter add about 30 briquettes and light. Preheat the oven near the starter. Dice the bacon slices into ½ inch pieces. When the coals are started, put 10 to 12 coals underneath the oven. You can put a tiny bit of shortening or oil in the oven on the bottom and sides. The bacon will actually add quite a bit of grease. When the oven is pretty hot, add the bacon and fry for a short time, until not quite done. Remove some of the bacon grease but leave about a tablespoon in. Drain and add the cans of beans, plus about ½ to ¾ of the bottle of beer, and the chicken stock. Stir together well. Add about 6 more briquettes to the bottom and bring to a boil. Once boiling, remove 4 or 5 coals from the bottom, put the lid on the oven and add 12 coals to the top. Let simmer for about 40 minutes. Add a bit of chicken stock and stir if needed. Take one of the chilis from the adobo can and mince the chili. Add it to the beans along with a tablespoon of the adobo sauce from the can. Add in a half to ¾ cup of the pico de gallo. Stir and let simmer for another 15 to 20 mins. Serve with some of the cheese sprinkled over the top.
Daniel Ryan-Special for Mountain Daily Star

